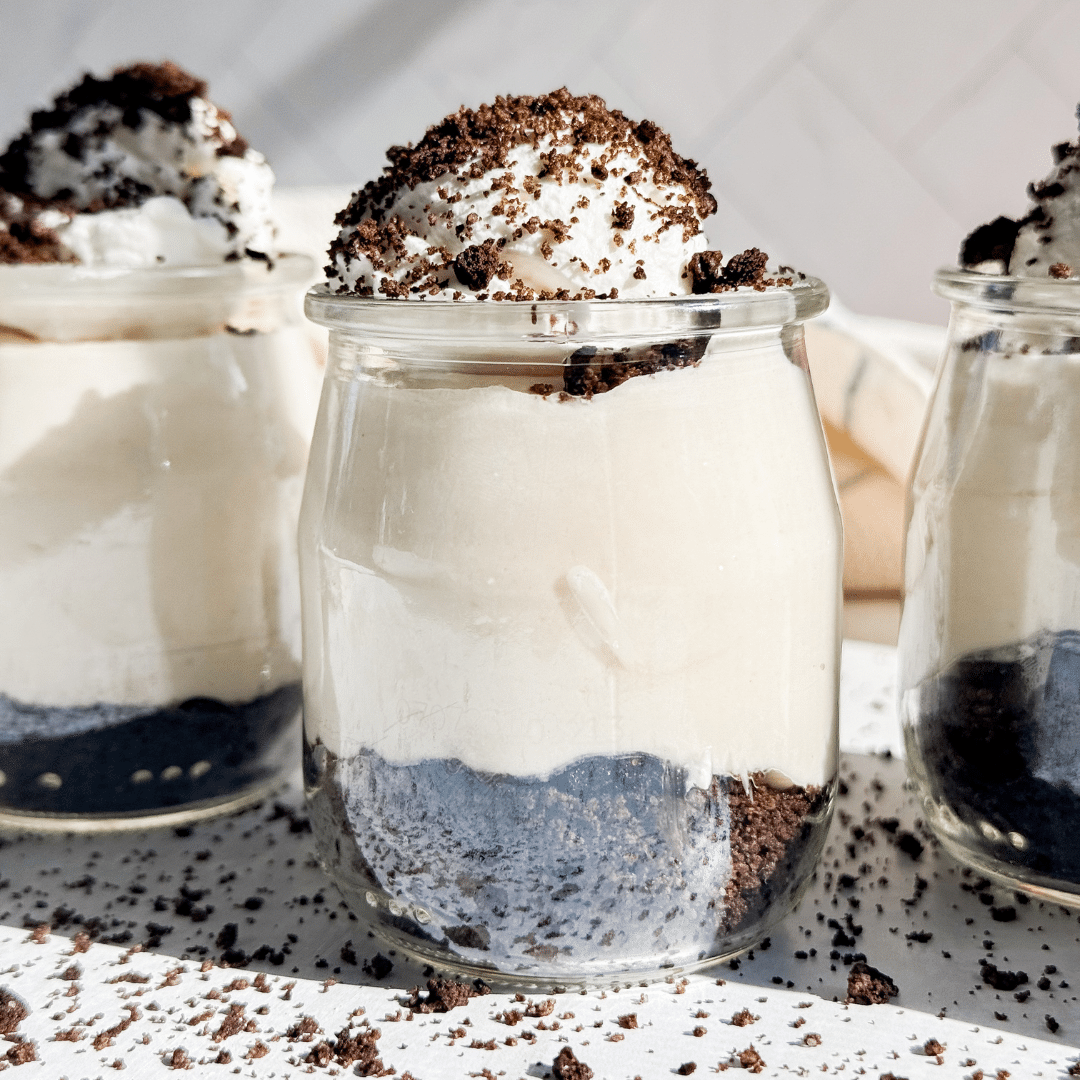
This one’s for the cheesecake lovers with a serious sweet tooth and a soft spot for Oreos—minus the oven and with a sneaky boost of protein. These no-bake High Protein Oreo Cheesecake Cups are creamy, dreamy, and made with cottage cheese and Greek yogurt for a filling treat that actually fuels you. Whether you're meal-prepping snacks for the week or need a chilled dessert that won’t heat up the kitchen, this recipe is calling your name.

why you'll love these oreo cheesecake cups
- No baking necessary: because the oven in the summer? Hard pass
- Protein-packed & delicious: cottage cheese and Greek yogurt kept things creamy and satisfying.
- Oreo crust: I mean, do we even need to explain this one?
- Great for make-ahead: Chill them in the fridge or freeze for a firmer, ice cream-like vibe.
High Protein Oreo Cheesecake Cups Ingredients
Here’s what makes these cheesecake cups so dang good:
- Oreo crumbs: The crust is made with crushed Oreos because, well, is there a better cookie? Didn’t think so. The cookie bits give you that classic cookies-and-cream vibe, and a splash of water helps them press together and hold their shape without needing butter.
- Cottage cheese: The surprise MVP. Cottage cheese gives us a thick, creamy texture and adds a big boost of protein. And before you ask—no, it doesn’t taste like cottage cheese once it’s blended. Promise. Just silky, cheesecake-y goodness.
- Greek yogurt: Adds more protein and that signature tang that balances out all the sweetness. Go for a thicker variety to keep the texture rich and smooth.
- Maple syrup: Our natural sweetener of choice! Just enough to make it feel like dessert, but not so much that it’s cloying. It also gives a subtle depth that complements the Oreos beautifully.
- Vanilla extract: A splash of vanilla brings the whole filling together and gives it that classic cheesecake flavor.

How to Make High Protein Oreo Cheesecake Cups
- Make the Crust: In a bowl, combine the Oreo crumbs. If you want the crust to stick together more firmly, stir in 1–2 teaspoons of water. Press 1–2 tablespoons of the mixture into the bottom of muffin liners or small ramekins. Set aside while you whip up the filling.
- Blend the Filling: Add the cottage cheese, Greek yogurt, vanilla extract, and maple syrup to a high-speed blender or food processor. Blend until silky smooth—this can take 1–2 minutes depending on your blender. Scrape down the sides as needed.
- Assemble: Spoon the filling evenly over the crusts. Smooth out the tops with the back of a spoon or spatula.
- Chill: Pop the cheesecake cups into the fridge for at least 4 hours to firm up. If you want them extra thick and ice cream-y, freeze them for 1–2 hours instead.
- Top & Serve: Top with extra crushed Oreos, a drizzle of chocolate, or a spoonful of Greek yogurt. Serve chilled straight from the fridge or let thaw for 5–10 minutes if frozen.

Tips for Success
- Full-fat cottage cheese = creamier filling. Trust me.
- A silicone muffin pan or parchment liners makes it super easy to pop these out once chilled.
- Use a high-speed blender to really get that filling smooth and creamy. You don’t want curds—just cloud-like cheesecake texture.
How to Store
- Fridge: Store in an airtight container for up to 4–5 days.
- Freezer: Freeze for up to 2 months. Let thaw for 5–10 minutes before serving.

FAQS
How long do I need to chill these mini cheesecakes? You should chill the Oreo cheesecake cups for at least 4 hours to allow the filling to set. For an even firmer texture, you can chill them overnight or place them in the freezer for 1-2 hours.
Can I freeze these mini cheesecakes?Yes! These cheesecake cups freeze well. Just make sure to wrap them individually or place them in an airtight container to prevent freezer burn. When you're ready to enjoy them, simply thaw them in the fridge for a few hours or leave them at room temperature for about 10-15 minutes.
Can I use a different sweetener instead of maple syrup? Absolutely! If you prefer a different sweetener, you can swap the maple syrup for honey, agave syrup, or a sugar-free sweetener, depending on your preference.
Can I use a different type of cookie for the crust? Yes! If you're not a fan of Oreos or want to try something different, you can swap the Oreo crumbs for graham cracker crumbs, chocolate wafer crumbs, or any other cookies you enjoy!
Do I need to use a high-speed blender or food processor? While a high-speed blender or food processor will give the smoothest, creamiest filling, you can use a regular blender or even an electric mixer in a pinch. Just be sure to blend until smooth!
How long will these cheesecake cups last in the fridge? These mini cheesecakes will last for up to 5 days in the fridge when stored in an airtight container. They’re perfect for meal prep or make-ahead treats!
If you make these High Protein Oreo Cheesecake Cups, I would really appreciate a comment and rating down below, under the recipe card. Don’t forget to take a picture and tag me over on Instagram, Tik Tok, or Pinterest. For more ideas, check out my Dessert Recipes page.
High Protein Oreo Cheesecake Cups
Ingredients
Crust
- 1 cup oreo crumbs
Cheesecake Filling
- 1 1/3 cup cottage cheese
- 3/4 cup yogurt
- 1/2 tsp vanilla extract
- 1/4 cup maple
Instructions
- Add the Oreo crumbs to a bowl and stir in 1–2 teaspoons of water (optional) if you'd like the crust to hold together better. Press about 1–2 tablespoons of the crumbs into the bottom of each muffin liner or small cup to form the crust. Set aside.
- In a high-speed blender or food processor, combine the cottage cheese, yogurt, vanilla extract, and maple syrup. Blend until completely smooth and creamy—this may take a minute or two depending on your blender.
- Spoon the cheesecake filling over the Oreo crusts, dividing it evenly between the cups. Use the back of a spoon or spatula to smooth out the tops.
- Place the cups in the fridge for at least 4 hours, or until set. For a firmer texture, you can chill them overnight or pop them in the freezer for 1–2 hours


No Comments